Authentication
Table of contents
Introduction
WebApp uses the Hawk Authentication mechanism. It is an authentication mechanism famous for its replay attack protection. To make authorized requests using Hawk, you’ll need a public key and a private key. For the rest of the document, we’ll refer to them as API Keys.
API Keys
API Keys can be created from the WebApp instance. Currently, there are two people who can do that:
- WebApp users with an administrator’s role.
- Our Customer Happiness Team.
If you have an administrator role, follow these steps to create API keys.
- Log in into the WebApp and from the app menu, go to Administration.
- Click on Delphi.
- Click on the + Symbol to create a pair of keys.
- A dialog opens and will provide the public and private keys.
If the private-key portion is ever lost or stolen, a new key pair must be generated.
There is no ability to recover a private-key after the initial generation.
The private-key is only provided once during initial creation. Please store it somewhere safe.
Request Independence
All requests happen independently and require authentication. That is, you must authenticate every request you make. The private and public keys you created above are used for the Hawk authentication.
The public key will serve as Hawk Auth ID, while the private key will be used as Hawk Auth Key. No logins are required, and no sessions need to be handled by the requester. There is no dependency on session lifetime or preservation.
Examples
Request Using Postman
If you use Postman, please make sure that you use an updated version of the native/standalone application. Postman as a browser extension and previous versions of the native app did not support Hawk Authorization correctly.
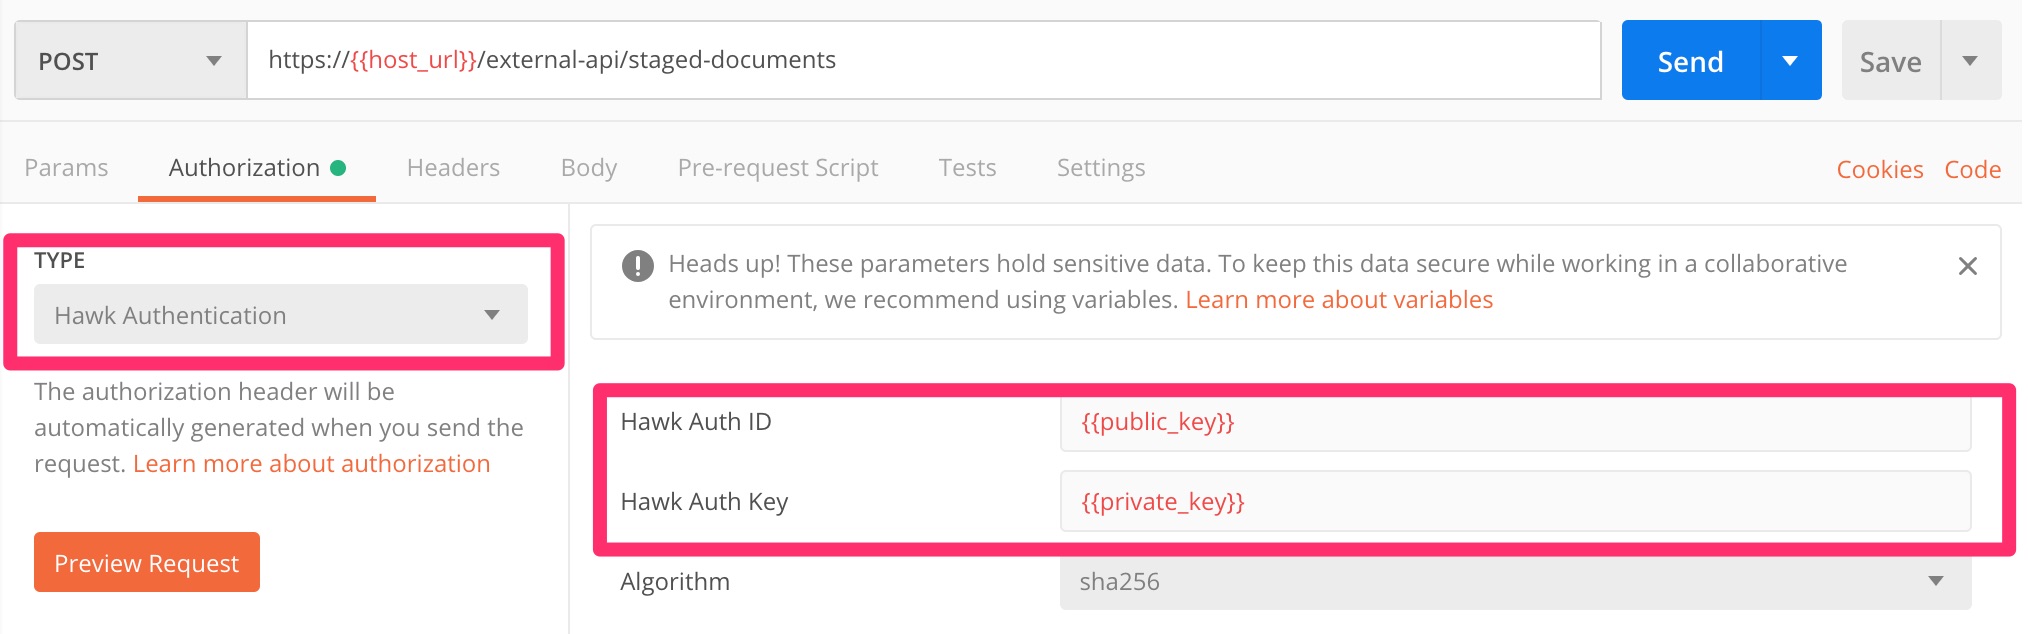
To make valid Hawk requests with Postman, follow these steps:
- At the Authorisation tab, select Hawk Authentication
- Input your public key in “Hawk Auth ID” input field and your private key in “Hawk Auth Key” input field.
Request Using JavaScript
In this implementation, the public key is used as the Hawk Auth ID, while the private key is used as Hawk Auth Key.
const Request = require('request');
const Hawk = require('hawk');

const credentials = {
    id: 'your-public-key',
    key: 'your-private-key',
    algorithm: 'sha256'
}

const requestOptions = {
    uri: 'https://<FQDN>/external-api/staged-documents',
    method: 'GET',
    headers: {}
};

// Generate Authorization request header
const { header } = Hawk.client.header(
  'https://<FQDN>/external-api/staged-documents',
  'GET',
  { credentials: credentials }
);
requestOptions.headers.Authorization = header;

// Send authenticated request
Request(requestOptions, function (error, response, body) {
    // Authenticate the server's response
    const isValid = Hawk.client.authenticate(response, credentials, header.artifacts, { payload: body });

    // Output results
    console.log(`${response.statusCode}: ${body}` + (isValid ? ' (valid)' : ' (invalid)'));
});
Other Implementations
The following are some Hawk Client implementations that might be useful when authenticating with Hawk. These libraries are not maintained by Architrave; use at your own risk.